


Dapr生产者消费者示例
[TOC]
新一代云原生应用开发流程:
| 框架 | 版本号 |
|---|---|
| spring boot | 5.5.2 |
| dapr | 1.3.1 |
1、Dapr开发及调试 Spring Boot + Rabbitmq 应用流程
1.1、安装开发环境
-
安装 docker - 自行百度
-
安装 dapr, 建议使用 windows 11 的 linux 子系统,对于多语言开发非常方便 - 自行百度
-
初始化 dapr
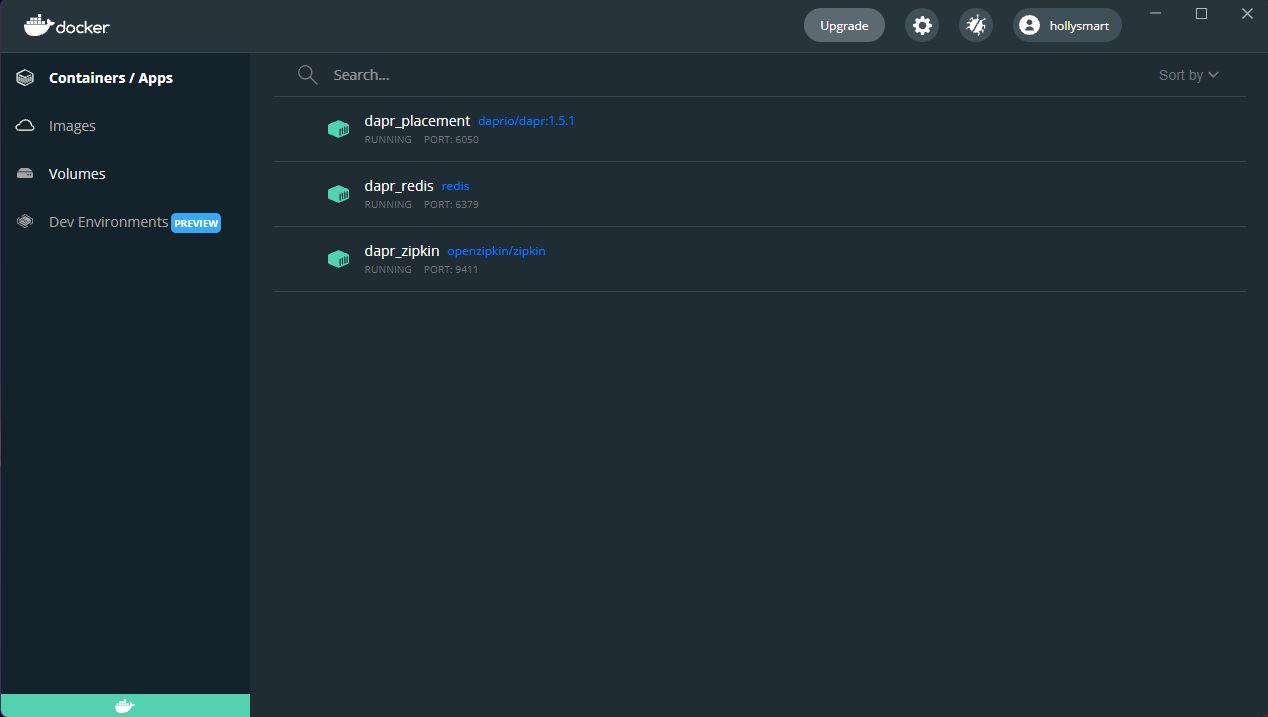
dapr init初始化完成会看到 docker 中启动了以下三个镜像:
1.2、创建 Spring Boot 应用
-
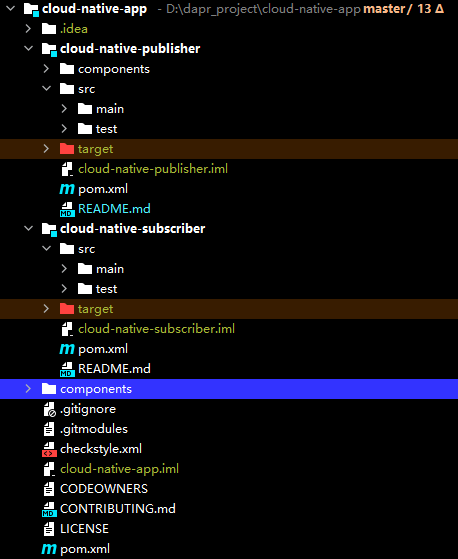
新建 spring-boot 项目如图:
1.3、生产端开发
-
cloud-native-publisher 生产端 pom.xml 文件中引入依赖
<dependency> <groupId>org.springframework.boot</groupId> <artifactId>spring-boot-starter-web</artifactId> </dependency> <dependency> <groupId>io.dapr</groupId> <artifactId>dapr-sdk</artifactId> </dependency> <dependency> <groupId>io.dapr</groupId> <artifactId>dapr-sdk-actors</artifactId> </dependency> <dependency> <groupId>io.dapr</groupId> <artifactId>dapr-sdk-springboot</artifactId> </dependency> <dependency> <groupId>com.squareup.okhttp3</groupId> <artifactId>okhttp</artifactId> </dependency> <dependency> <groupId>commons-cli</groupId> <artifactId>commons-cli</artifactId> </dependency> <dependency> <groupId>io.opentelemetry</groupId> <artifactId>opentelemetry-sdk</artifactId> </dependency> <dependency> <groupId>io.opentelemetry</groupId> <artifactId>opentelemetry-exporter-logging</artifactId> </dependency> <dependency> <groupId>io.opentelemetry</groupId> <artifactId>opentelemetry-exporter-zipkin</artifactId> </dependency> -
编写控制器类
@RestController
public class PublishMsgController {

    /**
     * 消息数量
     */
    private static final int NUM_MESSAGES = 10000;

    /**
     * 消息生存时间
     */
    private static final String MESSAGE_TTL_IN_SECONDS = "1000";

    /**
     * 消息队列名称
     */
    private static final String TOPIC_NAME = "lite.product.save";

    /**
     * 消息队列服务器名称
     */
    private static final String PUBSUB_NAME = "rabbitbus";

    @Autowired
    protected DaprClient daprClient;

    @GetMapping
    public void sendMsg() {
        for (int i = 0; i < NUM_MESSAGES; i++) {
            String message = String.format("This is message #%d", i);
            daprClient.publishEvent(PUBSUB_NAME, TOPIC_NAME, message, singletonMap(Metadata.TTL_IN_SECONDS, MESSAGE_TTL_IN_SECONDS)).block();
            System.out.println("Published message: " + message);
        }
        System.out.println("消息发送成功...");
    }
}
1.4、消费端开发
-
cloud-native-subscriber 消费端 pom.xml 文件中引入依赖
<dependency> <groupId>org.springframework.boot</groupId> <artifactId>spring-boot-starter-web</artifactId> </dependency> <dependency> <groupId>io.dapr</groupId> <artifactId>dapr-sdk</artifactId> </dependency> <dependency> <groupId>io.dapr</groupId> <artifactId>dapr-sdk-actors</artifactId> </dependency> <dependency> <groupId>io.dapr</groupId> <artifactId>dapr-sdk-springboot</artifactId> </dependency> <dependency> <groupId>com.squareup.okhttp3</groupId> <artifactId>okhttp</artifactId> </dependency> <dependency> <groupId>commons-cli</groupId> <artifactId>commons-cli</artifactId> </dependency> <dependency> <groupId>io.opentelemetry</groupId> <artifactId>opentelemetry-sdk</artifactId> </dependency> <dependency> <groupId>io.opentelemetry</groupId> <artifactId>opentelemetry-exporter-logging</artifactId> </dependency> <dependency> <groupId>io.opentelemetry</groupId> <artifactId>opentelemetry-exporter-zipkin</artifactId> </dependency> -
编写消费端控制器
public class SubscriberMsgController {

    private static final ObjectMapper OBJECT_MAPPER = new ObjectMapper();

    /**
     * 消息队列名称
     */
    private static final String TOPIC_NAME = "lite.product.save";

    /**
     * 消息队列服务器名称
     */
    private static final String PUBSUB_NAME = "rabbitbus";

    @Autowired
    protected DaprClient daprClient;

    @Topic(name = TOPIC_NAME, pubsubName = PUBSUB_NAME)
    @PostMapping(path = "/liteProductSave")
    public Mono<Void> handleMessage(@RequestBody(required = false) CloudEvent<String> cloudEvent) {
        return Mono.fromRunnable(() -> {
            try {
                System.out.println("Subscriber got: " + cloudEvent.getData());
                System.out.println("Subscriber got: " + OBJECT_MAPPER.writeValueAsString(cloudEvent));
            } catch (Exception e) {
                throw new RuntimeException(e);
            }
        });
    }
}
1.5、调试工具配置及运行
-
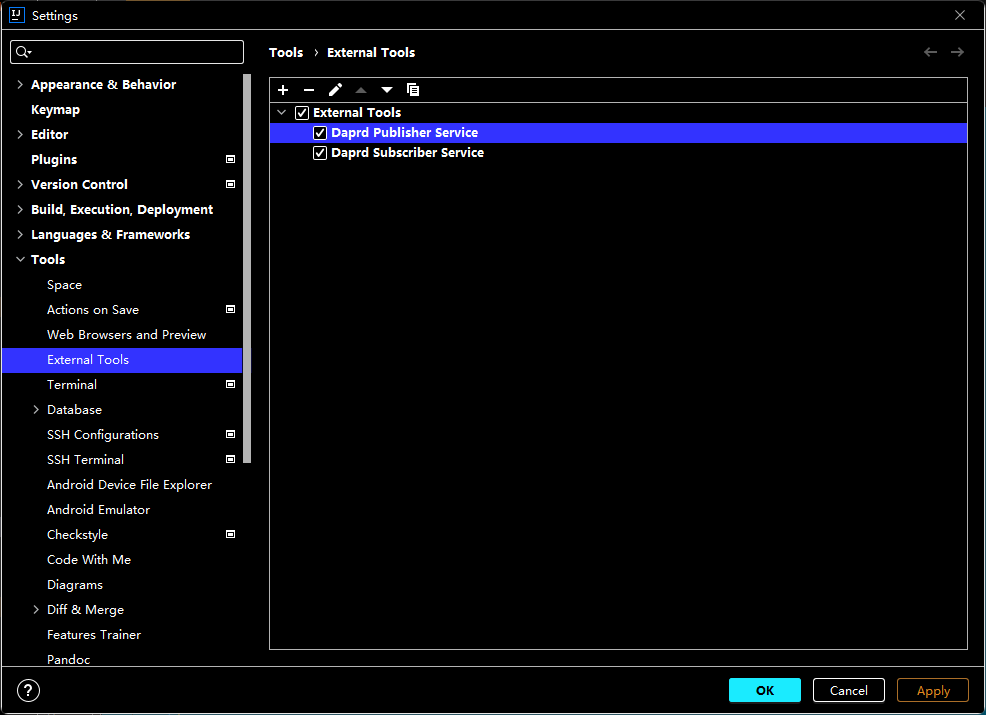
Intellij 打开菜单 File / Settings / Tools / External Tools, 添加两个 daprd.exe 外部调试工具, 如图:
-
第一个:
Name: Daprd Publisher Service、
Program: 配置为 C:\dapr\daprd.exe, daprd.exe 在初始化dapr以后生成在 C:\Users\wyf.dapr\bin 这个路径
Arguments: -app-id cloud-native-publisher –components-path ./components/pubsub -app-port 8000 -dapr-http-port 60000 -dapr-grpc-port 50000 -placement-host-address localhost:50005 -metrics-port 9090
-
-app-id 应用名字
-
-app-port 应用端口号
-
-dapr-http-port 相当于docker中的映射参数, 将内部端口号 3000 映射到主机端口号 3005,浏览器中访问的时候用
-
-dapr-grpc-port 相当于docker中的映射参数, 将内部端口号 3000 映射到主机端口号 52000
-
-placement-host-address
-
第二个:
Name: Daprd Publisher Service、
Program: 配置为 C:\dapr\daprd.exe, daprd.exe 在初始化dapr以后生成在 C:\Users\wyf.dapr\bin 这个路径
Arguments: -app-id cloud-native-subscriber –components-path ./components/pubsub -app-port 8001 -dapr-http-port 60001 -dapr-grpc-port 50001 -placement-host-address localhost:50005 -metrics-port 9091
-
-app-id 应用名字
-
-app-port 应用端口号
-
-dapr-http-port 相当于docker中的映射参数, 将内部端口号 3000 映射到主机端口号 3005,浏览器中访问的时候用
-
-dapr-grpc-port 相当于docker中的映射参数, 将内部端口号 3000 映射到主机端口号 52000
-
-placement-host-address
-
-
启动调试工具,点击 Intellij 菜单栏 Tools / External Tools 里面能看到
1.6、Spring Boot启动参数配置及运行
-
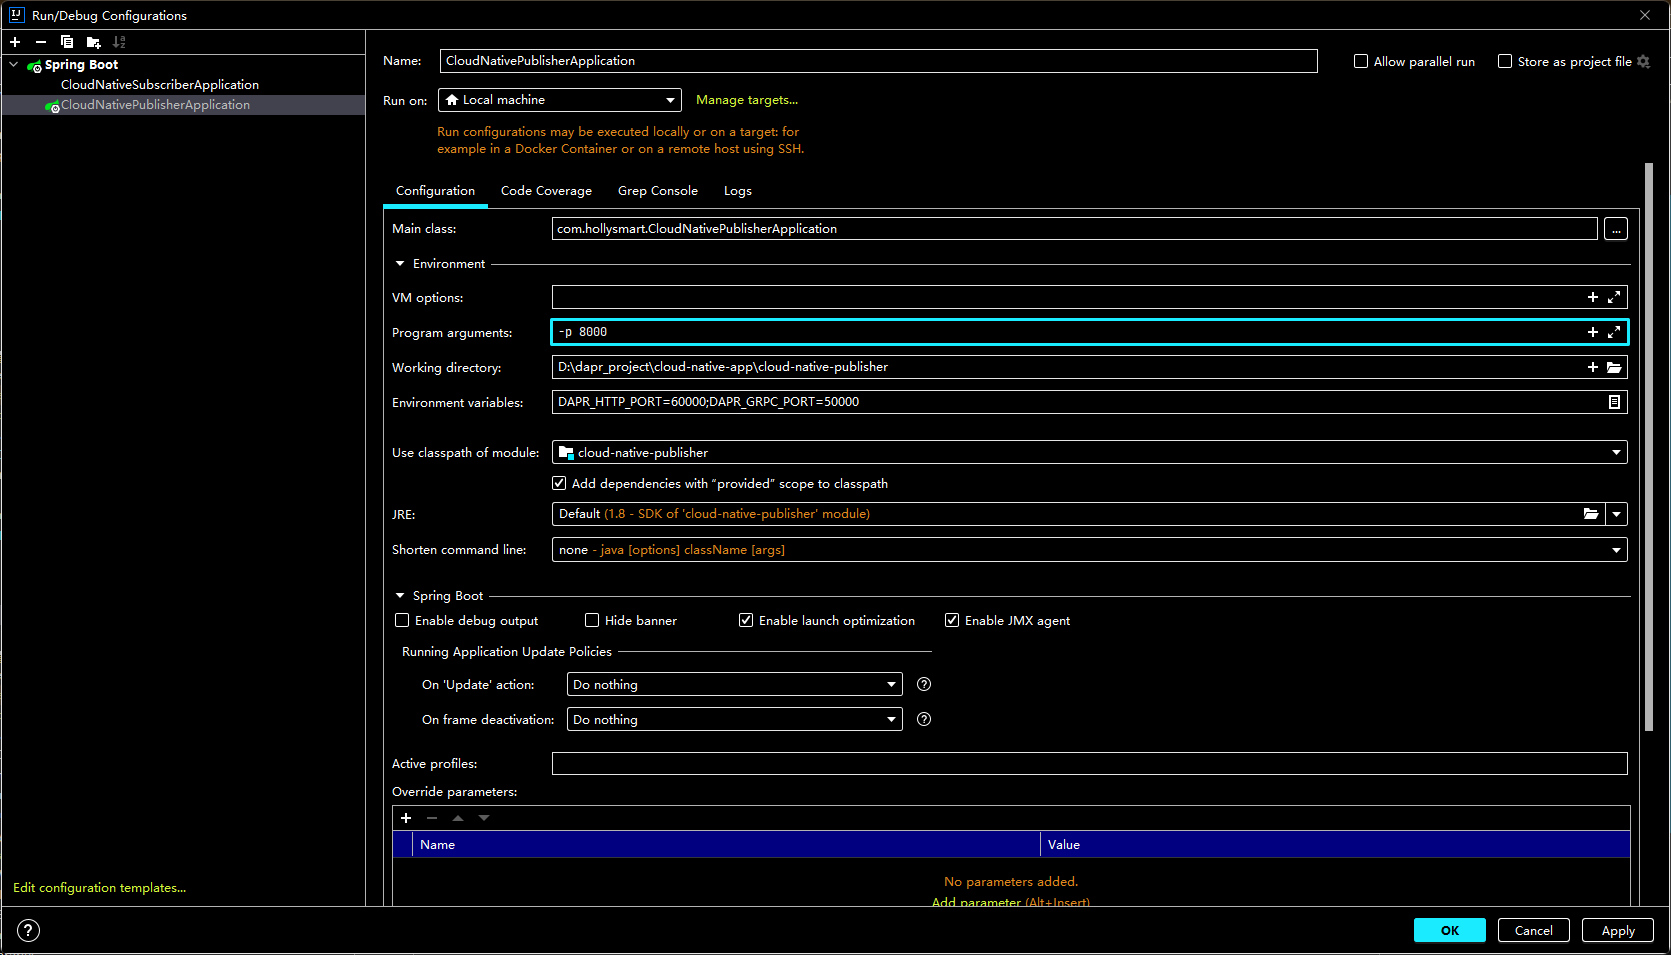
配置 Spring Boot 应用启动参数,如图:
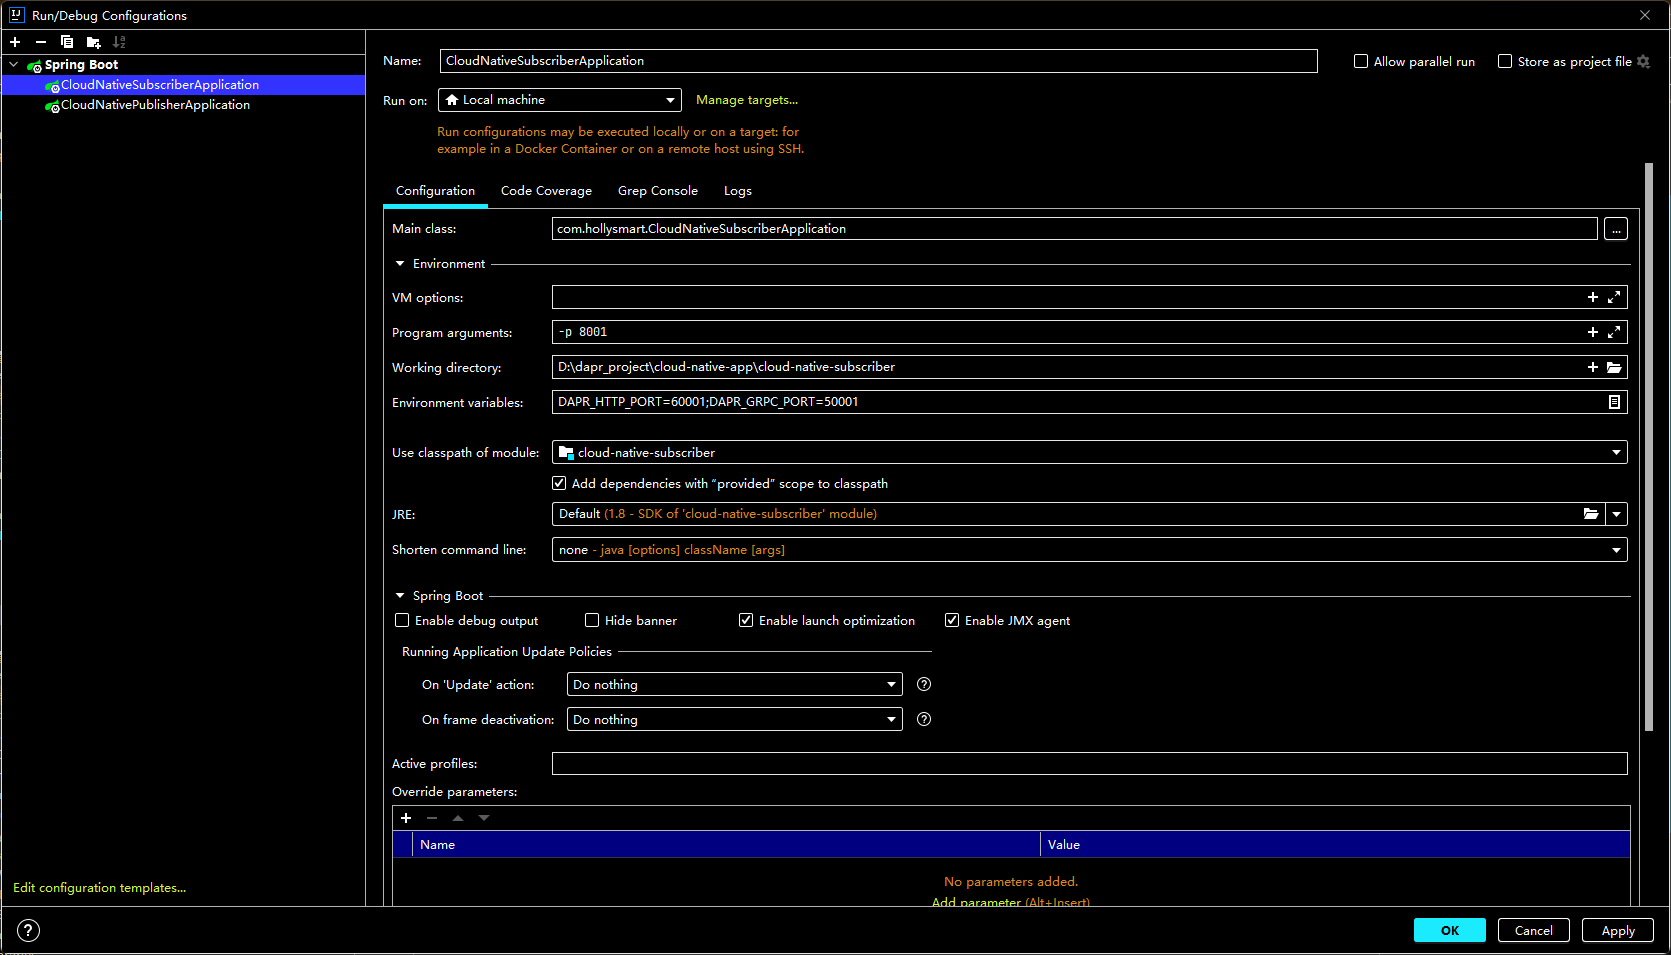
-
Debug模式启动应用
-
打开浏览器访问: http://localhost:60000/v1.0/invoke/cloud-native-publisher/method 即可看到接口返回值 “test”
-
访问方式:
http://localhost:<端口号>/v1.0/invoke/<应用名称>/method/<方法名称, 没有不传, 比如上面的接口有个POST的 /say 接口, 就需要传 say>
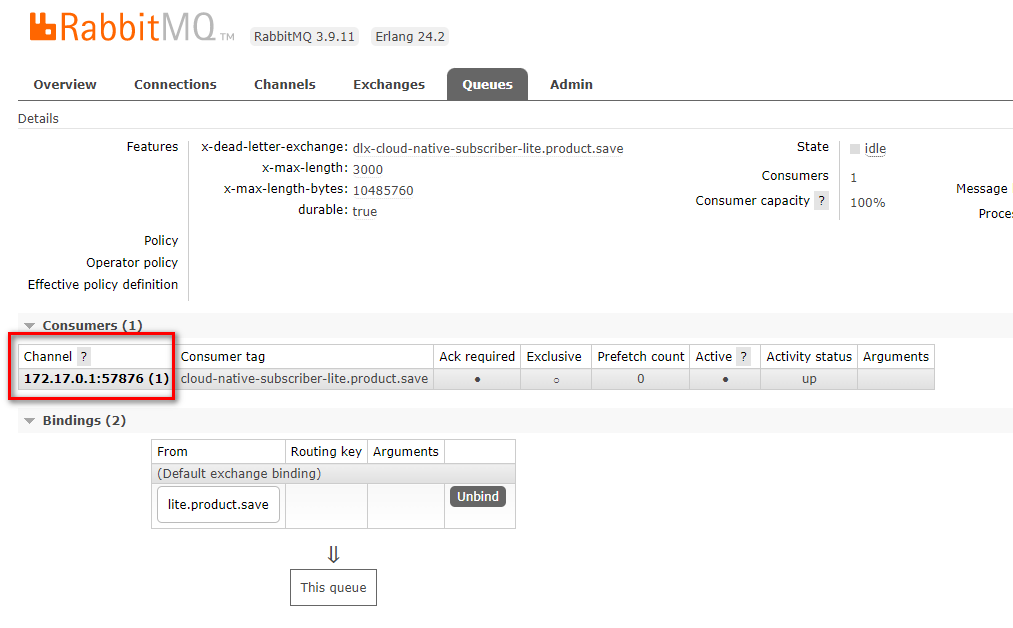
1.7、启动 rabbitmq 消息队列服务
-
启动后会发现消费者正在监听队列
1.8、启动 rabbitmq 消息队列服务
感谢您的反馈。如果您有关于如何使用 KubeSphere 的具体问题,请在 Slack 上提问。如果您想报告问题或提出改进建议,请在 GitHub 存储库中打开问题。
 上一篇
上一篇
